Perfection Loop
The perfection loop is a very good knot for putting a loop in the end of your leader in preparation for a loop-to-loop connection. It is an inline knot, meaning that the resulting loop is straight in line with the standing end and will not throw the connection off at an angle. The perfection loop is best used in the heavier parts of your leader as it is not an extremely strong knot (i.e. it works great sections other than the tippet where it will be much stronger than the lighter tippet material).
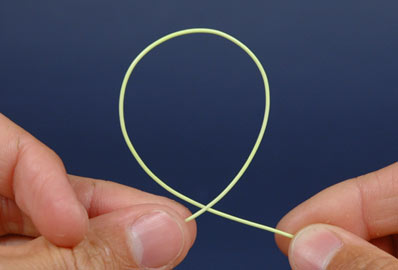
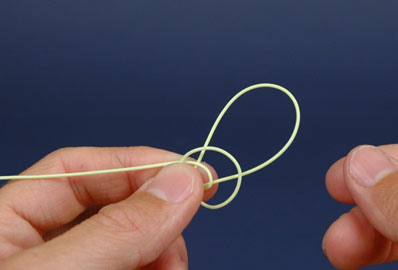
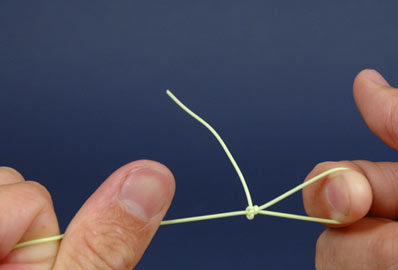
1: Make a loop with the tag end behind the standing end. The easiest way to make the loop is to roll the tag end of the line between your middle finger and thumb like when you snap your fingers while holding on to the standing end a few inches down. As you put a twist in the line it will want to roll into a loop.
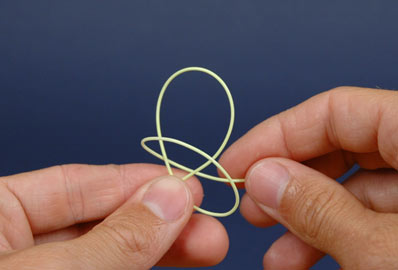
2 - 3: Make a second loop that will start behind the first loop then cross in front of it. Hold both loops together with your left hand (if you are right handed).
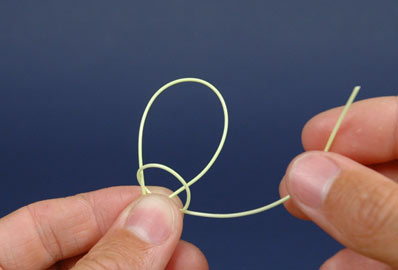
4 - 5: Take the standing end, bring it around to the right side of the knot again, and place it between the two loops.
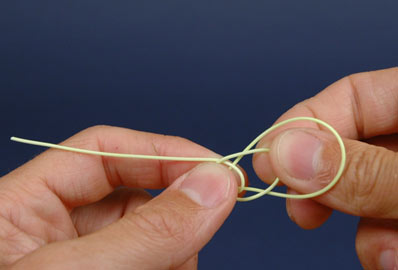
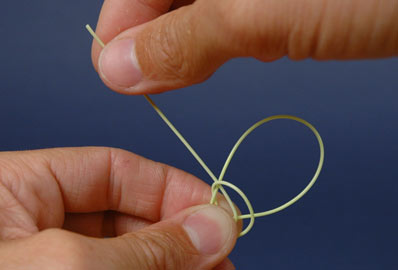
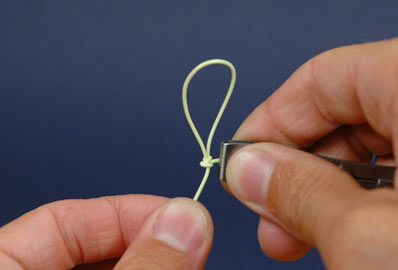
6 - 7: Reach through the back loop (the first loop you created), grasp the front loop, and pull it back through.
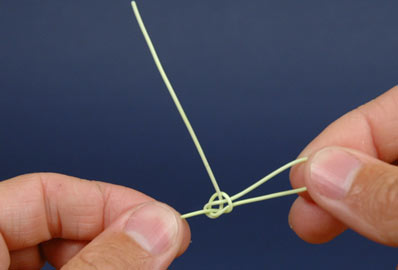
8 - 9: Moisten the knot and tighten by pulling firmly on the loop and standing end. If the knot is tied correctly the standing end will exit the knot at a 45 degree angle.
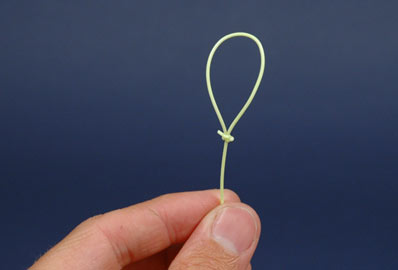
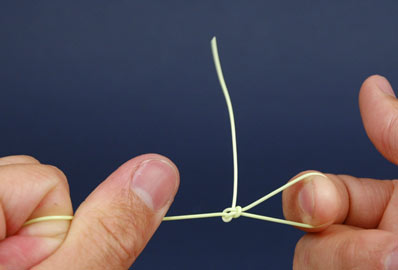
10: Trim the knot leaving a short tag end.
11: The finished knot.
Our brands
